Stop That Goat
Nothing is more important on any car than the brakes. Bad brakes will ruin your day every single time; good brakes can save your life, and your car. The stock braking systems on our beloved muscle cars leaves a little to be desired, even in top form, the diminutive front discs are just barely adequate to stop the car at moderate speeds, and are prone to glazing. If the car came equipped with 4-wheel drums, forget about stopping at all. There is a simple solution to the problem though, replace it.
Stainless Steel Brakes Corporation offers braking systems from bare bones disc upgrades to serious high-performance braking systems. Most of the kits are based on conversion from drum brakes, though they will also work using disc brake spindles. SSBC covers most of the popular muscle cars as well as late model cars, such as the GTO and Solstice.
For high performance applications, the Force 10 Tri-Power system is the way to go. This system utilizes 3-piston calipers to clamp down 13” rotors in the front and large single-pistons calipers with built-in E-brakes for the rear. When purchased in kit form, they come complete with new master cylinder and small-diameter power booster. They even come with adjustable proportioning valves with a pressure gauge, new hard lines and braided steel flex lines, everything you need to properly install the brakes.
Another cool feature of the SSBC kit is the optional powder coating. When you order the brakes, you can choose to have the calipers powder coated in blue, black, yellow, orange, red, silver or polished. We had our calipers coated orange, which beautifully matched the orange paint on our ’69 Judge convertible.
The installation of the kit was straightforward, and with the exception of a few small details, everything went off without a hitch. The new brakes outperform the stock 11” discs and rear drums so much that it feels like an entirely different car. Safe stopping is now a reality, no more wincing every time you hit the brakes, hoping it will stop.

1. The SSBC brake kit came with everything needed to complete the install. They even sent a new power booster, master cylinder, and proportioning valve. We chose to use the booster and master cylinder that were in the car as they had recently been replaced and work fine.

2. We started at the back of the car, expecting it to be the most time consuming. As it turned out, the rear went just as quick as the front. The bolt holding the axle pin in place slid out easily.

3. The axle pin keeps the axles from walking inward, which would allow the C-clips to fall off. That would be a disaster.

4. Our GTO has a Posi-tract unit, so the C-clips were not as easy to get too. A pair of long needle-nose pliers works great here.

7. The wheel bearings and seals had recently been replaced on the Goat, so we moved to the caliper mounts. This bracket bolts to the axle using the supplied grade 8 bolts.

8. The actual caliper bracket was next and was mounted using the supplied aluminum spacers and bolts.

9. The caliper bracket was mounted so the calipers would sit in front of the rotor, and not be in the way of the shocks. The axles were reinstalled and the rear end buttoned up at this point.

10. The SSBC calipers can mount front or rear, depending on application, so they have 2 ports for the brake line. You want the brake line to be on top, above the piston, so we used the supplied plug and copper washer for the bottom port.

11. The supplied stainless steel brake line (hence the name) was installed in the upper port, using the copper washers (don’t forget the washers)

12. The rotors were slid over the studs. There was slight error made that we didn’t catch until after the photo shoot. We installed the rotors going the wrong direction; we had to swap them all out after the install was completed.

13. The calipers were installed and bolted down. The pads fit a little tight, but after a test run, everything came in line.

14. The install is going pretty good at this point, about 2 hours into it. The Force 10 rear discs are 11”, plenty big for rear brakes.

15. The original E-brake cable was junk, so we made a new one using some 3\16” cable and some cable ferrules.

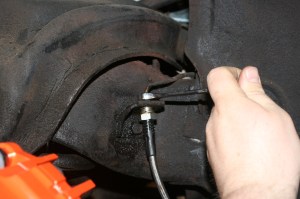
16. The kit comes with these adapter pieces to mate the new braided line with the original copper lines. Do NOT use Teflon tape on brake lines.

17. The front install started by removing the original disc brakes. The SSBC kits work on drum or disc spindles, so no worries there.

20. With the backing plates off, the caliper bracket was installed. The supplied aluminum spacer was placed on the upper bolt.

21. With the help of Red Line Autosports, they put some torque on the lower mounting bolt for the caliper bracket.

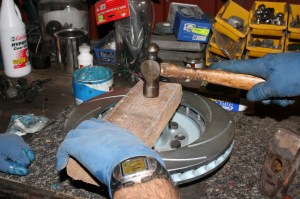
23. The new seal was installed using a 2×4 and a hammer to apply even pressure and not bend the seal.

24. The new 13” rotor was installed on the spindle and the new castle nuts and cotter pins were installed. The kit comes with spindle caps with “SSBC” stamped in, they really look nice.

25. The calipers come mounted to the secondary bracket that bolts to the caliper mount on the spindle. The braided steel line was pre-installed, but not tightened. The calipers have 3 bleed screws, one for each piston. All 3 need to be bled.

26. The new braided line mounted right up to the old lines. The kit came with new line, but we chose to use the originals. Had we replaced the master cylinder, we would have used the new line.

27. With the wheels installed, the rotors really fill the 18” billet wheels. 17” wheels are required for the 13” rotors, so we have a little extra clearance. All said, the entire process took about 6 hours.
Sources:
Red Line Auto Sports
http://www.redlineautosports.com/
Stainless Steel Brake Co.


